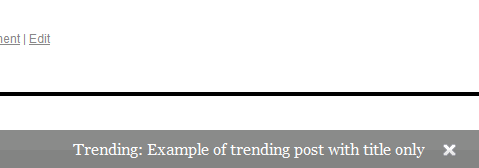
Sticky trending bar is an accidental post happened to tell about how it works to my Facebook friends. There are many sticky or floating bar WordPress plugins or toolbar for all platforms. But in this tutorial I will teach you a light weight code which can be used for both blogs and websites running on any platform. The sticky trending bar also changes the opacity value when you scroll down and on mouse-over you get back to 0% opacity. So lets start the tutorial
Step 1:Lets start with the HTML section which has the content to be display on your blog or website
<div id='stickybar'>
	Trending: <a href='YOUR POST URL'>Your blog title goes here</a>
<input type='button' id='closebtn' >
</div>
WordPress user add it to the footer before </body> ,change the information appropriately and save it. Blogger users can also follow the same process.
Step 2: In order to give a visual appeal to the sticky bar, we are going to design the sticky bar using CSS.
#stickybar {
	border-bottom:1px solid #ECF1EF;
	background:#151715;
        font-size:16px;
        color:#FFF;
	padding:10px 20px;
	position:fixed;
	bottom:0;
	left:0;
	z-index:2000;
	width:100%;
        text-align:center;
}
#stickybar a {
       color:#FFF;
       text-decoration:none;
}
#closebtn {
       background:url('http://3.bp.blogspot.com/-yl6foC85E0U/TbRPUVi8GPI/AAAAAAAABWI/yd3Bi5BkHoY/s1600/close.png') top no-repeat;
       border:none;
       margin-left:15px;
       position:absolute;
}
If you want to change the background color from default black to any color which you like, use our color code picker and change the color code values for the background.
Step 3: Now in order to achieve the opacity and close button action, we are using this jQuery code. Before adding this ensure that you already have jQuery initialized on your blog. If not add <script src="http://code.jquery.com/jquery-1.5.js"></script> before </head>
If you already have jQuery initialized leave that.
<script type='text/javascript'>
$(document).ready(function() {
(function() {
//settings
var fadeSpeed = 200, fadeTo = 0.5, topDistance = 30;
var sibar = function() { $('#stickybar').fadeTo(fadeSpeed,1); }, stbar = function() { $('#stickybar').fadeTo(fadeSpeed,fadeTo); };
var inside = false;
//do
$(window).scroll(function() {
position = $(window).scrollTop();
if(position > topDistance && !inside) {
//add mouseover events
stbar();
$('#stickybar').bind('mouseenter',sibar);
$('#stickybar').bind('mouseleave',stbar);
inside = true;
}
});
//close
$('#closebtn').live('click', function(event) {
$('#stickybar').toggle('show');
});
})();
});
</script>
If you want to speed up the fading speed and the percentage of opacity, change the values under //settings in the code. WordPress and Blogger users ensures that the code is placed within </head>
After following the three steps carefully you can see the sticky trending bar in your blog or website. If you any questions, drop in your comments.


