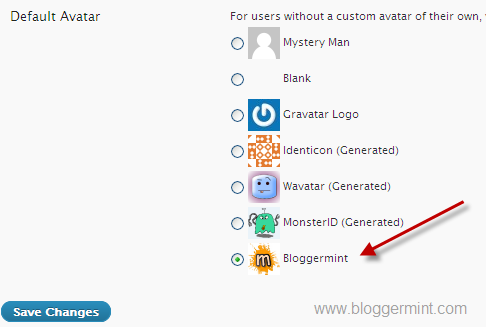
WordPress is a beautiful blogging CMS and can be easily personalized, but at many case WordPress users are forced to use the default gravatars or avatar. So in this post I will teach you how to change the default gravatar for your WordPress blogs. Basically WordPress comes with some default gravatars which can be see through Settings> Discussion. Hence this tutorial will teach you to add another default gravatar, which is going to be your custom made gravatar for your WordPress blog. Lets head on to the tutorial.
Step 1: Most of the WordPress theme has functions.php template file. So check for the file using Appearance > Editor. If you don’t find functions.php create a new PHP file with the name functions and paste the code within the file.
add_filter( 'avatar_defaults', 'newgravatar' );

function newgravatar ($avatar_defaults) {
    $myavatar = get_bloginfo('template_directory') . '/images/gravatar.jpg';
    $avatar_defaults[$myavatar] = "YourBlogName";
    return $avatar_defaults;
}
Once you add the code in functions.php, you need to change default path with your own, then type your blog name instead of YourBlogName and update the file. That’s it. (Make sure that you add the image file within the template directory and don’t use any external server to link up the image)
Step 2: Navigate to Settings > Discussion and at the bottom, you can see your new avatar being added to the default gravatar list. So just click on it and save the changes.
Credits (Thanks to Zach for the original code)


